NexT是一款简洁优雅且易于使用的主题,配置比较简单,只需要稍微修改配置文件即可,功能也比较全,分类、归档、标签显示明了,让人一看就知道干嘛的。
NexT主题官方文档还算详细,但是有些部分的介绍不够详细,这里我做部分补充,并对自己做了修改的部分作介绍。
Hexo 有两份主要的配置文件(_config.yml),一份位于站点根目录下,另一份位于主题目录下。为了描述方便,在以下说明中,将前者称为站点配置文件,后者称为主题配置文件。
NexT主题安装
下载NexT主题
1 2
| $ cd your-hexo-site` $ git clone https://github.com/iissnan/hexo-theme-next themes/next
|
修改站点配置文件
修改站点配置文件_config.yml,找到以下部分
1 2 3 4
| # Extensions # # theme: landscape
|
修改为
1 2 3 4 5
| # Extensions # # # theme: landscape theme: next
|
至此,NexT主题就安装好了,非常方便,在Hexo中切换主题只需修改站点配置文件中theme属性来配置,想换就换。
选择Scheme
NexT 通过 Scheme 提供主题中的主题。Mist是NexT主题自带的主题,可以通过修改主题配置文件中的scheme属性获得。
1 2
| # Schemes scheme: Mist #去掉默认的注释即可切换为Mist主题
|
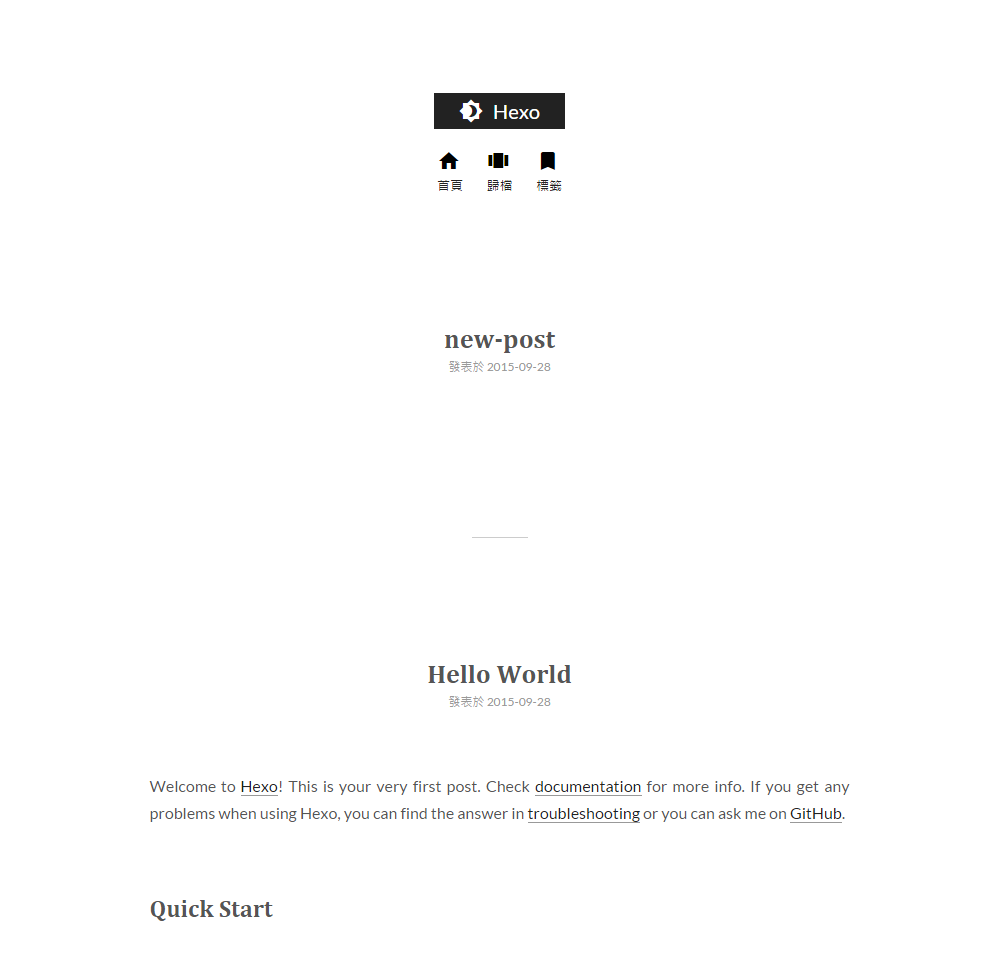
默认主题:
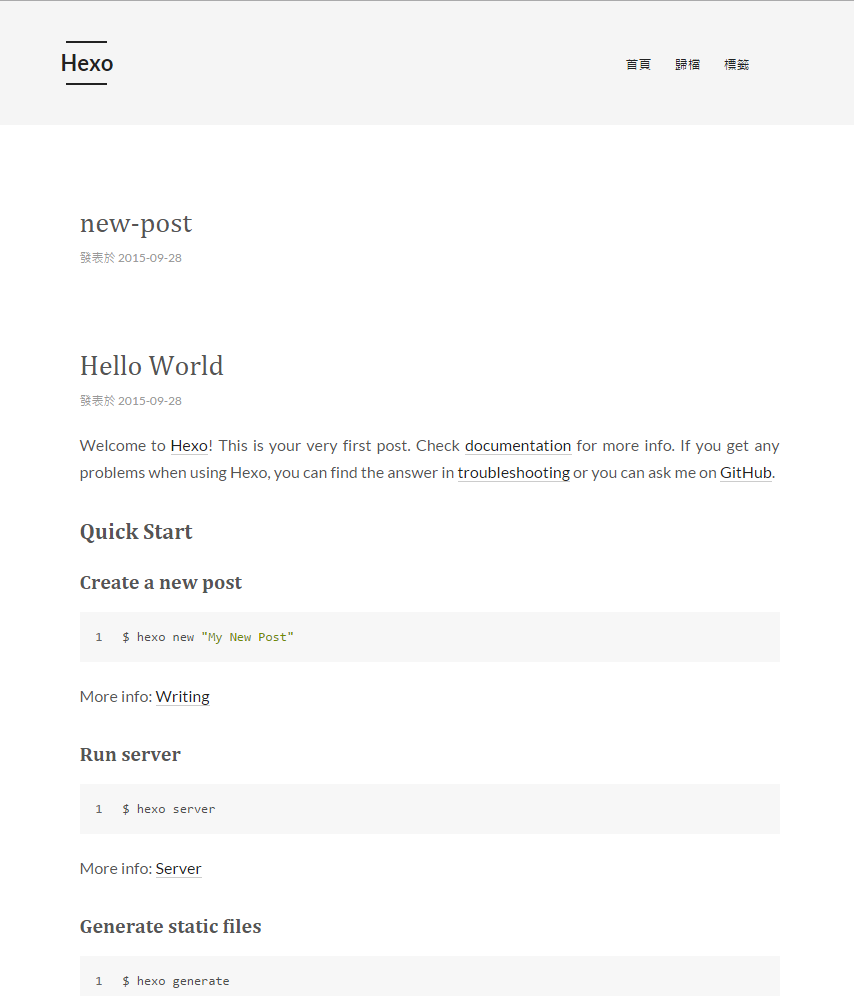
Mist主题:
菜单设置
NexT主题菜单设置,用于设置博客上方导航栏,在主题配置文件中修改。
1 2 3 4 5 6 7
| menu: home: / #主页 categories: /categories #分类页(需手动创建) #about: /about #关于页面(需手动创建) archives: /archives #归档页 tags: /tags #标签页(需手动创建) #commonweal: /404.html #公益 404 (需手动创建)
|
只是在menu选项中设置还不能让标签页面、分类页面生效,需要我们手动创建
标签页面
1>运行以下命令
同时,在/source目录下会生成一个tags文件夹,里面包含一个index.md文件
2>修改/source/tags目录下的index.md文件
1 2 3 4 5
| title: tags date: 2015-09-29 14:37:02 type: "tags" ---
|
3>修改主题配置文件
去掉tags的注释
1 2 3 4 5 6 7
| menu: home: / #主页 categories: /categories #分类页(需手动创建) #about: /about #关于页面(需手动创建) archives: /archives #归档页 tags: /tags #标签页(需手动创建) #commonweal: /404.html #公益 404 (需手动创建)
|
分类页面
1>运行以下命令
1
| hexo new page "categories"
|
同时,在/source目录下会生成一个categories文件夹,里面包含一个index.md文件
2>修改/source/categories目录下的index.md文件
1 2 3 4 5
| title: categories date: 2015-09-29 14:47:21 type: "categories" ---
|
3>修改主题配置文件
去掉categories的注释
1 2 3 4 5 6 7
| menu: home: / #主页 categories: /categories #分类页(需手动创建) #about: /about #关于页面(需手动创建) archives: /archives #归档页 tags: /tags #标签页(需手动创建) #commonweal: /404.html #公益 404 (需手动创建)
|
侧边栏头像设置
编辑站点配置文件,增加avatar字段
1 2
| # 头像 avatar: /images/avatar.png
|
头像图片须放置在主题的/source/images/目录下
多说评论系统
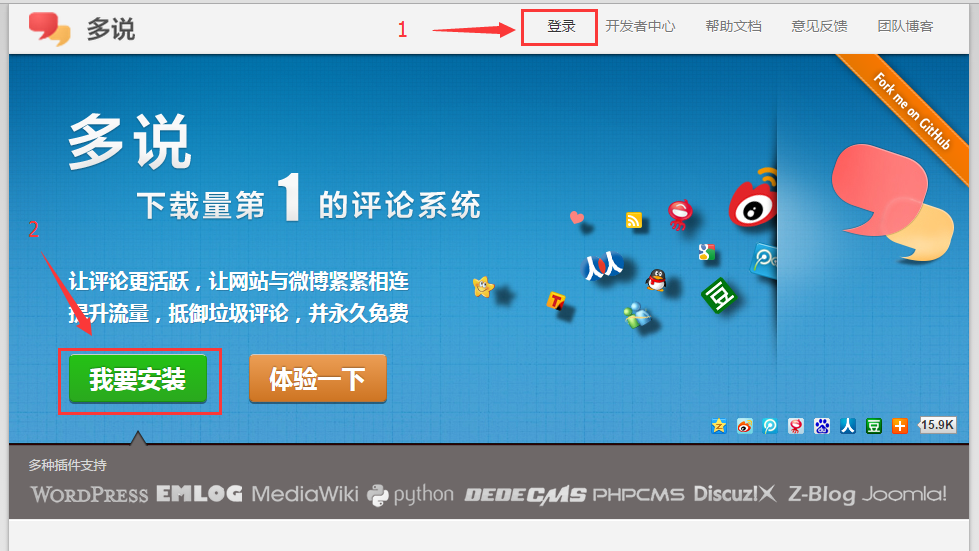
使用多说前要注册自己的多说账号,并创建一个站点。
1> 登录->选择首页的”我要安装”
2> 创建站点
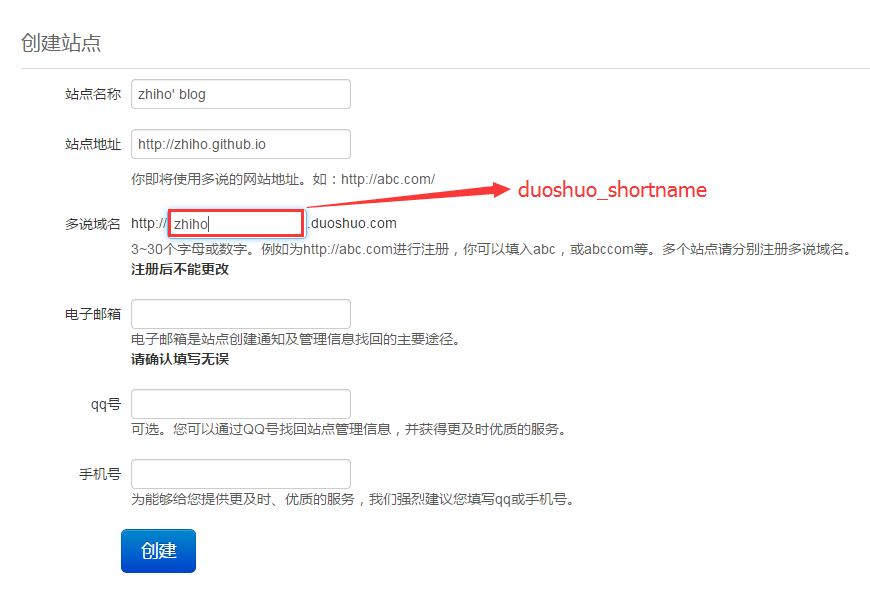
红色所指部分是你的duoshuo_shortname(如:我的duoshuo_shortname就是zhiho)
3> 修改站点配置文件
在站点配置文件中增加duoshuo_shortname字段,duoshuo_shortname就是上一步中你填写的值。
1 2
| # 多说 duoshuo_shortname: zhiho
|
至此,当你重新访问你的博客时,在每篇博文后面就会有多说的评论框。
但是,你会发现在分类页和标签页也会看到评论框,如果你感觉不爽可以通过下面的方法去掉。
去除分类页标签页多说评论
修改站点的/source/categories/目录下的index.md文件
1 2 3 4
| title: categories date: 2015-09-18 21:46:42 type: "categories" comments: false
|
同样修改站点的/source/tagss/目录下的index.md文件即可去掉标签页的评论框
站点访问计数
站点访问计数我使用的是不蒜子
使用非常方便,只需一行脚本+一行标签
显示站点总访问量
我们使用的是hexo,所以要找到网站的布局文件,不同的主题的布局文件可能不一样,下面教程是针对NexT主题做出的修改。
找到站点的themes/next/layout/_partials目录下的footer.swig文件
将以下脚本和标签插入到文件中
1 2 3 4
| <script async src="https://dn-lbstatics.qbox.me/busuanzi/2.3/busuanzi.pure.mini.js"></script> 本站总访问量 <span id="busuanzi_value_site_pv"></span>     您是第<span id="busuanzi_value_site_uv"></span>个来到的小伙伴
|
插入到这里
1 2 3 4 5 6 7 8 9 10 11 12 13 14
| <div class="powered-by"> {{ __('footer.powered', '<a class="theme-link" href="http://hexo.io">Hexo</a>') }} </div> <div class="theme-info"> {{ __('footer.theme') }} - <a class="theme-link" href="https://github.com/iissnan/hexo-theme-next"> NexT{% if theme.scheme %}.{{ theme.scheme }}{% endif %} </a> </div> # 插入到这里 {% block footer %}{% endblock %}
|
显示单页面访问量
不蒜子目前是不支持在首页显示每篇博文的计数的,而且NexT主题中,首页文章显示跟具体文章显示会用到同一个模板文件(themes/next/layout/_macro目录下的post.swig文件),所以我们需要稍微修改一下模板的代码。
1>修改themes/next/layout/_macro目录下的post.swig文件
位于文件开头,在第三个参数的位置,增加is_pv字段
1
| {% macro render(post, is_index, is_pv, post_extra_class) %}
|
插入以下代码,用于区分文章页面跟首页
这里不用像”显示站点总访问量”中那样安装脚本,否则会出现重复计数的问题。
1 2 3 4 5
| {% if is_pv %} <span> | <span id="busuanzi_value_page_pv" ></span>次阅读 </span> {% endif %}
|
插入这个位置
1 2 3 4 5 6 7 8 9 10 11 12 13 14 15 16 17 18 19 20 21 22
| {% if post.comments %} {% if (theme.duoshuo and theme.duoshuo.shortname) or theme.duoshuo_shortname %} <span class="post-comments-count"> | <a href="{{ url_for(post.path) }}#comments" itemprop="discussionUrl"> <span class="post-comments-count ds-thread-count" data-thread-key="{{ post.path }}" itemprop="commentsCount"></span> </a> </span> {% elseif theme.disqus_shortname %} <span class="post-comments-count"> | <a href="{{ url_for(post.path) }}#comments" itemprop="discussionUrl"> <span class="post-comments-count disqus-comment-count" data-disqus-identifier="{{ post.path }}" itemprop="commentsCount"></span> </a> </span> {% endif %} {% endif %} #插入到这里 </div> </header>
|
2>修改themes/next/layout目录下的post.swig文件
这个文件是文章的模板
找到以下代码,给render方法传入刚才第一步中设置的参数。
1 2 3 4 5 6 7 8 9 10 11 12 13 14 15 16 17
| {% block content %} <div id="posts" class="posts-expand"> #render方法第二个参数is_index为是否为首页 #第三个参数is_pv为我们刚才设置的是否显示计数 {{ post_template.render(page, false, true) }} <div class="post-spread"> {% if theme.jiathis %} {% include '_partials/share/jiathis.swig' %} {% elseif theme.duoshuo_shortname and theme.duoshuo_share %} {% include '_partials/share/duoshuo_share.swig' %} {% endif %} </div> </div> {% endblock %}
|
3>修改themes/next/layout目录下的index.swig文件
这个文件是首页的模板
找到以下代码,给render方法传入刚才第一步中设置的参数。
1 2 3 4 5 6 7 8 9 10 11
| {% block content %} <section id="posts" class="posts-expand"> {% for post in page.posts %} #render方法第二个参数is_index为是否为首页 #第三个参数is_pv为我们刚才设置的是否显示计数 {{ post_template.render(post, true, false) }} {% endfor %} </section> {% include '_partials/pagination.swig' %} {% endblock %}
|
至此,我们的站点计数功能就做好了~
sitemap插件
Sitemap 可方便管理员通知搜索引擎他们网站上有哪些可供抓取的网页,有助于让别人更好地通过搜索到自己的博客。
sitemap安装配置
1> 安装
1
| $ npm install hexo-generator-sitemap --save
|
2> 修改站点配置文件
1 2 3
| # Extensions plugins: - hexo-generator-sitemap
|
使用以下命令后,你可以在站点的/public目录下找到一个sitemap.xml文件,这个文件就是你的站点地图,里面包含你的站点的网页地址。
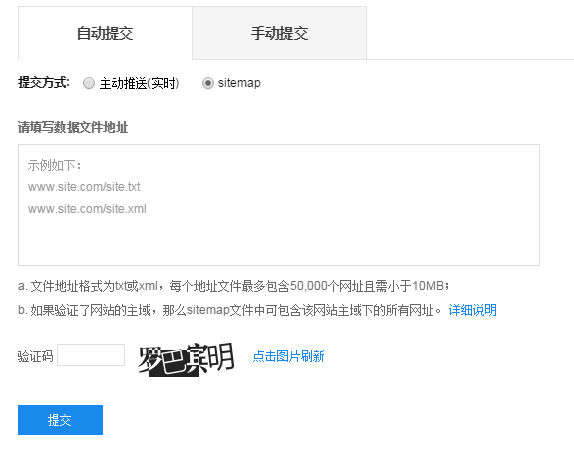
提交sitemap到google参考如何向google提交sitemap
sitemap.xml无法生成问题
问题:
使用以下命令安装sitemap插件后,按上面步骤配置,执行hexo g命令无法生成sitemap.xml文件。
1
| $ npm install hexo-generator-sitemap
|
观察发现博客根目录下的package.json文件中dependencies并没有sitemap插件的依赖。
1 2 3 4 5 6 7 8 9 10 11 12 13 14 15 16 17 18 19 20
| { "name": "hexo-site", "version": "0.0.0", "private": true, "hexo": { "version": "3.1.1" }, "dependencies": { "hexo": "^3.1.0", "hexo-deployer-git": "0.0.4", "hexo-generator-archive": "^0.1.2", "hexo-generator-category": "^0.1.2", "hexo-generator-index": "^0.1.2", "hexo-generator-tag": "^0.1.1", "hexo-renderer-ejs": "^0.1.0", "hexo-renderer-marked": "^0.2.4", "hexo-renderer-stylus": "^0.3.0", "hexo-server": "^0.1.2" } }
|
解决方法:
如果已安装sitemap插件,卸载sitemap插件
1
| $ npm uninstall hexo-generator-sitemap
|
安装sitemap插件时,加上- -save参数,如下
1
| $ npm install hexo-generator-sitemap --save
|
安装完成后,我们再查看博客根目录下的package.json文件,发现dependencies中已经有了sitemap插件,然后我们再执行hexo g命令,就能够在/public目录下找到一个sitemap.xml文件了。
baidusitemap安装配置
普通的Sitemap格式不符合百度的要求,所以我们要安装以下插件
1> 安装
1
| $ npm install hexo-generator-baidu-sitemap --save
|
2> 修改站点配置文件
1 2 3 4 5 6 7
| # Extensions plugins: - hexo-generator-sitemap - hexo-generator-baidu-sitemap
baidusitemap: path: baidusitemap.xml
|
同理,使用以下命令后,你可以在站点的/public目录下找到一个baidusitemap.xml文件。
3> 将baidusitemap.xml提交给百度
百度搜索引擎提交入口
使用hexo d命令将博客部署到github后,这里填写github上的baidusitemap.xml地址即可。
结束语
终于把自己博客的配置搞好了~这下应该可以愉快的写博客了~